Initial Setup
Once you get your account details from the support team, you'll need to set up Vendica.
This tutorial outlines the requirements and settings that are needed for Vendica to run smoothly and optimally.
Note
Browser Support
Please Note: Vendica only supports Google Chrome (or chromium based browser) and will not run as expected on other browsers.
e.g. Internet Explorer, FireFox or Opera.
Use this link to download Google Chrome.
Allowing Pop-Ups
This section of the tutorial describes how to allow Vendica pop-ups.
Make sure you're on portal.vendica.app in Google Chrome.
Select the lock on the left side of the address bar.
Then select 'Site Settings'.
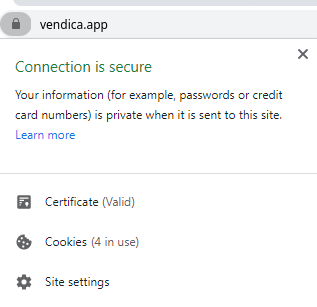
In the site menu scroll down to where is says 'Pop-ups and redirects'.
Select the little down arrow where it says 'Block (default)'.
Then select 'Allow'.
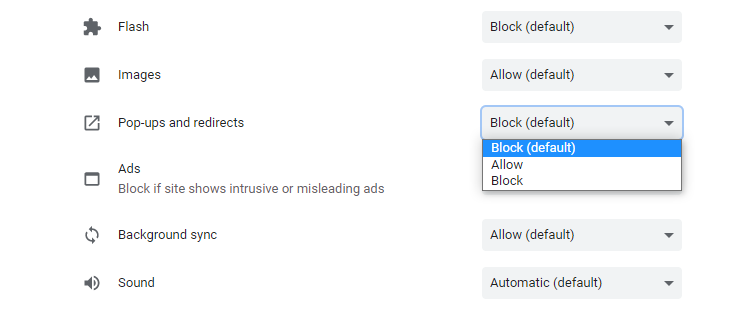
Once you have succesfully done these step you may now exit the site settings page and use Vendica.
Setting Tills And Terminals
This section of the tutorial describes how to setup tills and terminals.
Setting Terminals
Each computer is a terminal.
Now that you have installed the Vendica Chrome Extension, you'll need to set up your till and terminal/computer.
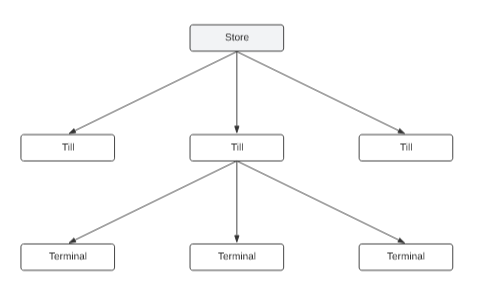
- Each till can have multiple terminals.
- A terminal belongs to only one till.
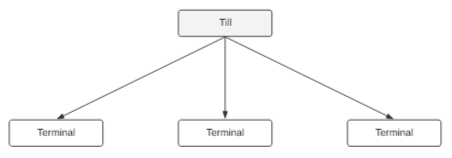
To setup a terminal:
- Go to the right-hand side of Google Chrome address bar
- Select the 'Puzzle' icon button

- Select the 'Vendica POS Extension' listing
A pop-up appears.
Enter a terminal name (with no spaces).
Select the 'Save' blue floppy disk icon.
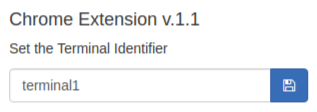
Your computer's terminal name is now set.
Warning
This only works on Google Chrome browser
Adding Tills
Important to understand:
- Each store can have multiple tills.
- A till can have multiple terminals
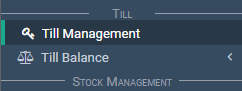
In the main menu, go to the Till section.
Select 'Till Management'.
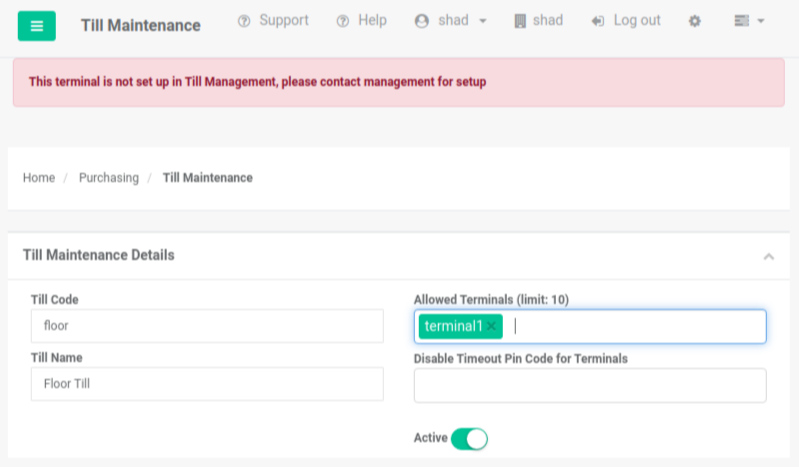
Next what you'll want to do is:
- Enter a unique code for the till
- Give it a name
- Fill in the Allowed Terminals which will be the same name you gave in the Vendica Chrome Extension.
In this example it's 'Till'.
Select the 'Save' button.
Notice the till appears in the 'Till' section.
Also notice that the correct terminal is set.

If you skip any steps and try to take payment for a sale, it'll still give you an error message 'Till Management is Not Setup.'
Tip
To add multiple terminals per till, see this how-to: Connecting Multiple Terminals.
Disabling Pin Codes
By default, a pin code protects certain areas of the Vendica system.
This protection can be disabled for selected terminals if required.
To do so, follow the below steps:
Access Till Management in the main menu located to the left of the screen.
The lower half of the Till Maintenance screen shows a list of all tills currently set up and the associated terminals.
- Find which till/terminal you wish to disable pin codes for.
- Select the 'Pencil' icon for that line. It's located on the far right hand side of the screen.
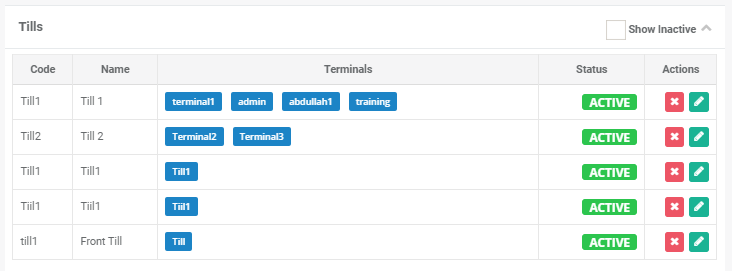
This will bring the information for the selected till back up into the top half of the screen where it can be edited.
Notice there's a 'Disable Timeout Pin Code for Terminals' field.
- Select inside this field to expose a list of available terminals.
- Select the terminal for which you would like to disable the pin code.
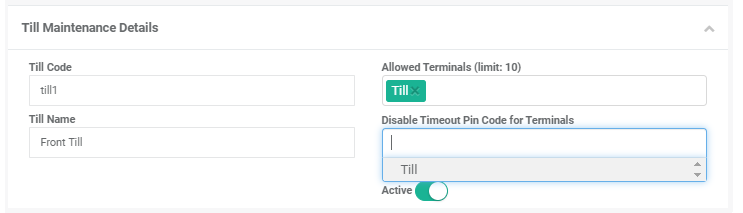
Once selected it should appear in the field in green as seen in the below screenshots.

Select the save button.
The selected terminals will no longer request a pin code to access blocked areas.
Using Store Settings
This section of the tutorial describes how to setup your store settings.
This is where you'll setup/change:
- the timezone
- select accepted payment types
- sale document print settings
- email address management
- other settings for your store
Adding Cards And Accounts
This is where you can change your store's accepted cards types and accounts.
Go to the Admin store settings.
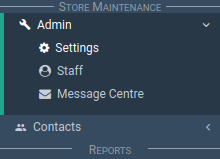
Select the 'Cards and Accounts' tab.
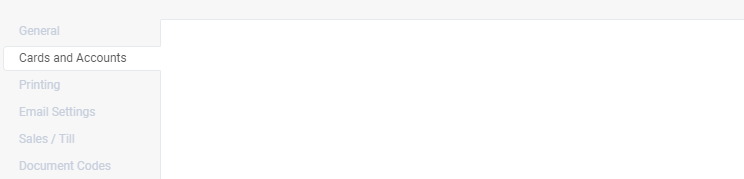
From this screen you can adjust:
- the card types
- account types
- payment types
For example if you do not want to take an American Express payment, just simply select the red 'X' icon.
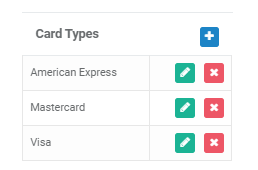
When you deactivate a card type or any other option on the screen it'll be highlighted in red like the image below.
If you want to activate this option, select the edit button (the green pencil).
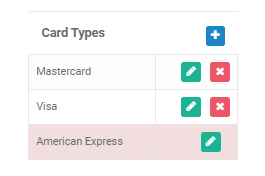
To add a card type or account select the blue plus button.
Setting Timezones
Here we'll setup the store's clock or time.
Note
It's important that your clock on your computer and Vendica is set to the correct time as this will affect the information you'll receive from Vendica including your end of day and rebates.
On the side menu select 'Admin' then select 'Settings'.
In the General tab.
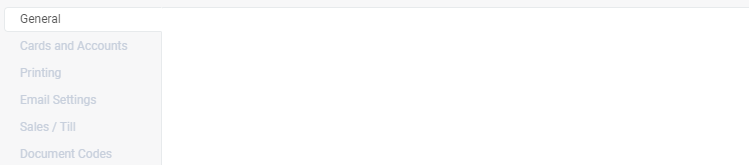
You can change your timezone settings.
To do this select the Timezone box and select your location.
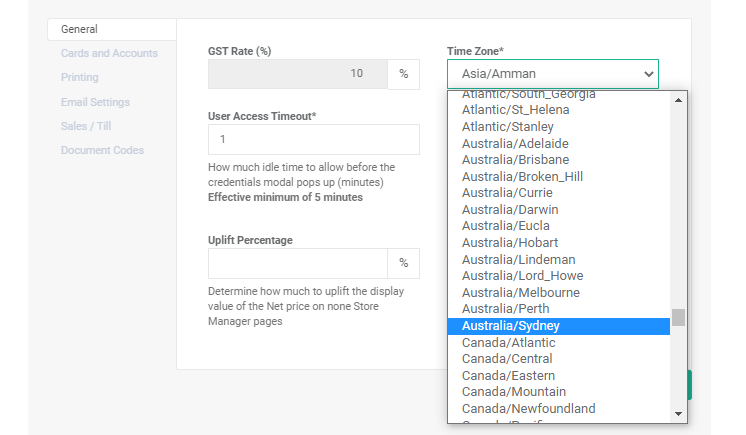
If your town is not listed select the city with the closest/equivalent timezone.
Then select 'Update'.